Autoimmune Desk Accessories: Size, Fit & Comfort Compared
By Priya Menon • 4th Apr
Introduction
When you're managing an autoimmune condition (whether rheumatoid arthritis, lupus, or another chronic inflammatory disease), your desk becomes a clinical space as much as a creative one. Autoimmune-friendly desk accessories aren't just about aesthetics; they're about reducing flare triggers, minimizing unnecessary strain, and building a workspace that works with your body, not against it. Yet most people buy ergonomic gear the wrong way: they pick a chair or mouse based on marketing claims, bring it home, and discover it doesn't fit their desk depth, their chair height, or their specific movement limitations.
This guide compares the core accessories that matter most for chronic condition workspace solutions, focusing on fit, measurement, and adaptation (not hype). I'll walk you through the questions I wish I'd asked before assembling my own desk, starting with the principle that clarity comes from mapping your space first; purchases should follow measured constraints and future plans.
FAQ: Autoimmune-Friendly Desk Accessories Compared
1. What makes a desk accessory "autoimmune-friendly" versus just "ergonomic"?
Ergonomic generally means reducing repetitive stress and strain. Autoimmune-friendly goes deeper: it also considers heat sensitivity, reduced grip strength, joint pain triggered by specific angles, and the cognitive load of setup complexity (which can worsen fatigue).
Key differences:
- Heat sensitivity: Some materials (certain wrist rests, synthetic armrests) trap heat and trigger inflammation. Natural materials like gel-infused memory foam or breathable mesh are gentler.
- Adjustability range: Standard ergonomic accessories have a narrow sweet spot. Autoimmune-friendly setups need generous adjustment to account for morning stiffness, afternoon fatigue, and day-to-day variation in pain levels.
- Low grip demand: Accessories requiring firm pressure to lock, clamp, or adjust (like some monitor arms) can be unusable during flares. Look for tools with smooth, low-resistance adjustment mechanisms.
- Predictable geometry: Inflammation-reducing desk accessories minimize surprise collisions or reach distances. A centered mouse that doesn't require sideways arm extension, for example, reduces shoulder tension that autoimmune conditions often amplify.
- No-drill options: Rheumatoid arthritis desk tools often can't rely on wall anchors or drilling (not just for renter reasons, but because the physical act of installation during a flare is impossible). Clamp and grommet systems preserve flexibility. For broader accessibility solutions tested by occupational therapists, explore our disability-friendly desk accessories guide.
Start with a fit map; buying gets calmer and cleaner.
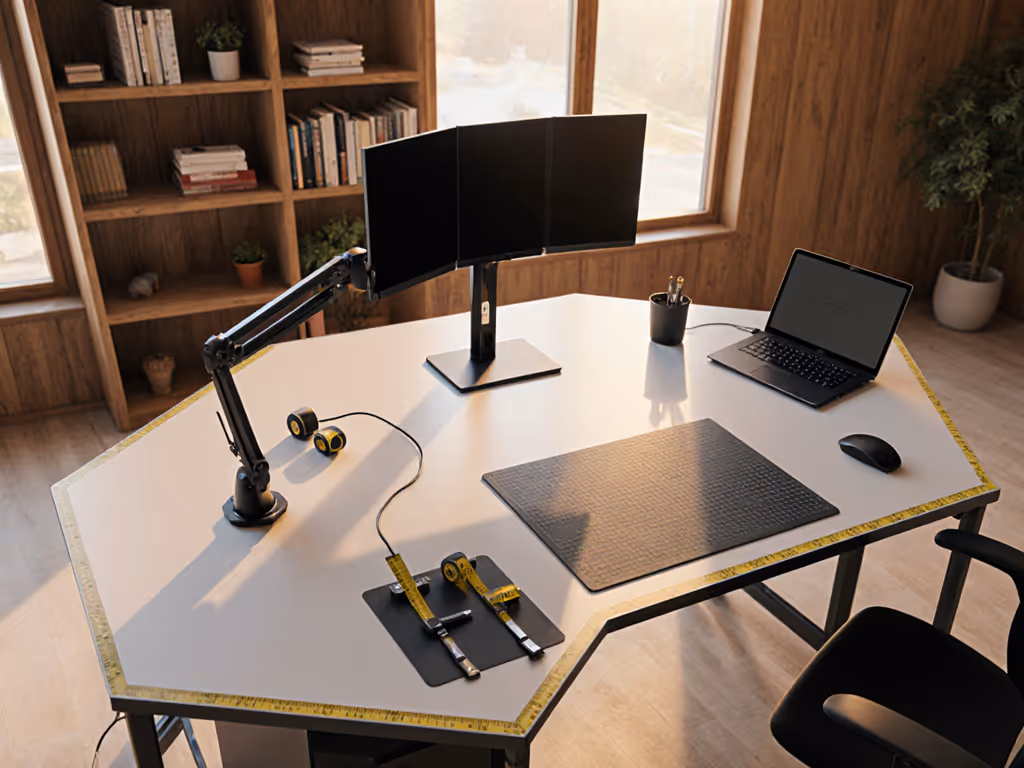
2. How do I measure my desk to choose the right accessories?
This is where most people stumble. A clamp that works on a 1.5-inch desktop will slide off a 0.75-inch particleboard, and a monitor arm rated for a 30-inch ultrawide won't clear your wall if your desk is too close to it. Before you buy anything, map your desk in plain-language measurements. If you run an ultrawide display, see our ultrawide monitor ergonomic blueprint to validate clearances and sightlines.
Starter measurement checklist:
- Desktop thickness: Measure from top to bottom edge. Most clamps grip between 0.75 and 2 inches; confirm your desk fits.
- Depth (front edge to back edge): A monitor arm mounted mid-desk eats 4-6 inches of depth. On a shallow 20-inch desk, this is catastrophic. On a 30-inch desk, it's fine.
- Width and crossbar location: If you have a desk with a crossbar or cable tray underneath, measure the gap from the floor. A clamp arm might not fit if the gap is less than 2 inches.
- Wall clearance: Measure the distance from your desk back edge to the wall. If it's less than 6 inches, a monitor arm that swings will hit drywall.
- Chair armrest width and height: Your keyboard and mouse need to sit 2-4 inches lower than your chair armrests (or your chair armrests need to be removable or swing away). Measure both.
- Outlet proximity: Power strips and cable runs need 3-foot clearance minimum. Note where outlets are relative to your desk center and corners.
Write these down. Photograph your desk from above and from the side. This fit map transforms uncertainty into a safe zone for every purchase decision.
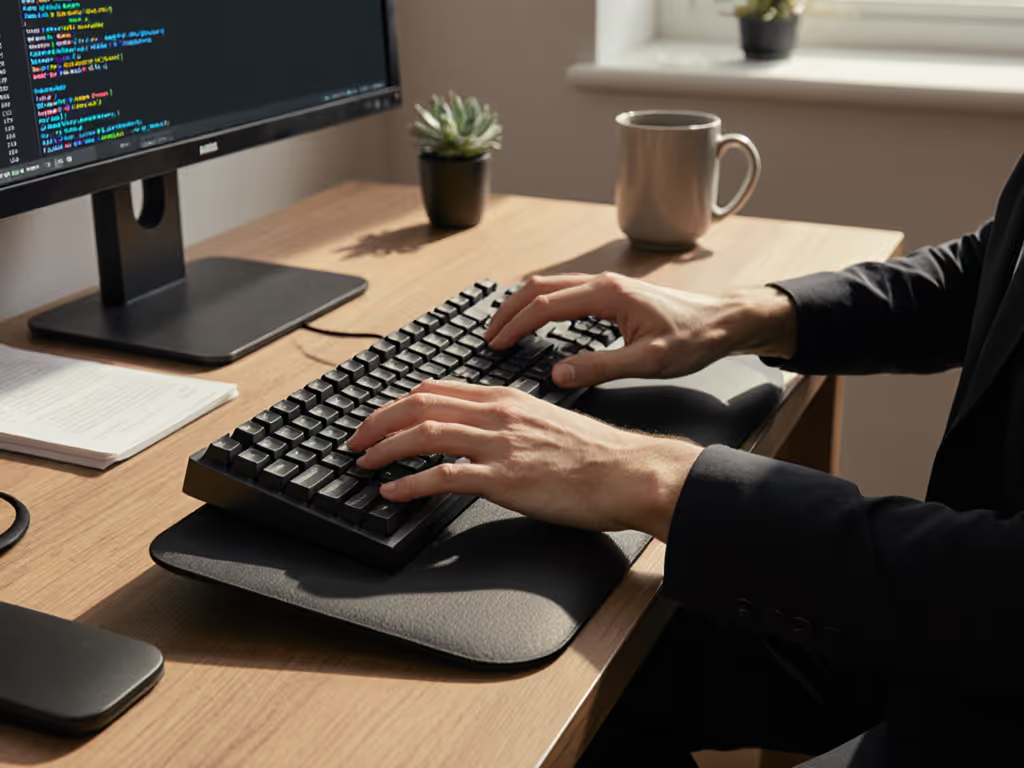
3. What's the difference between a "centered" mouse and a "vertical" mouse, and which is better for lupus-friendly workspace setups?
Both reduce wrist pronation (the palm-down twist that strains forearm tendons), but they approach it differently.
Centered mouse (e.g., joystick-style, trackball):
- Hand stays neutral, fingers reach inward.
- Eliminates sideways reach that pulls on shoulders.
- Requires less grip strength; good for flare days.
- Smaller movement radius; less arm fatigue over long hours.
- Drawback: may feel unnatural if you've used a traditional mouse for years; can increase finger dexterity demands.
Vertical mouse (handshake orientation):
- Hand rotates into a "handshake" position, reducing pronation.
- Feels more familiar to traditional mouse users.
- Requires slightly more grip strength to maintain the angle.
- Drawback: still demands some arm reach; may not fully eliminate shoulder tension.
For inflammation-reducing desk accessories specifically: A centered mouse edges ahead on flare days because it demands less active grip and allows your entire forearm to rest on the desk. If chronic hand or wrist pain is your main concern, see our fit-tested pain relief desk accessories for condition-specific picks. A vertical mouse is gentler on wrists than a standard mouse but less forgiving if grip strength is compromised. Consider pairing either with a compact keyboard (to keep your arms parallel and close together) so your shoulders stay neutral throughout the day.
4. Should I choose a chair with armrests, and how do I know if they'll interfere with my desk?
Armrests are genuinely helpful for autoimmune workspaces (when they're adjustable and positioned correctly). But they also collide with desks, drawers, and trays more often than people expect.
Safe armrest integration:
- Height: Armrests should be 2-4 inches lower than your seated elbow height. If they force your shoulders up or sideways, they increase upper-back strain and negate their benefit.
- Depth: Many armrests swing or slide away. This is valuable; when you scoot your chair closer to the desk (for typing), the armrests should either retract or pivot out of the way.
- Width and desk gap: Measure the armrest width. Does it fit between your desk and drawer? Or will it collide when you pull the chair in?
- No-drill reality: If you're renting or avoiding installation, look for chairs with removable or swing-away armrests. Fixed armrests are cheaper but less flexible.
Armrests reduce shoulder strain only when they don't force collisions or require you to sit farther back from your desk.
5. What role do wrist rests and lumbar cushions play in temperature-sensitive desk materials?
For people with lupus or other conditions triggered by heat, material choice matters as much as design.
Wrist rests:
- Gel-infused memory foam: Stays cool longer, slowly releases heat; good for mild heat sensitivity.
- Synthetic foam: Traps heat; can trigger inflammation during long sessions.
- Fabric-covered (cotton or natural latex): Breathes better than plastic-backed rests; air circulation helps.
- Best practice: Choose a rest that keeps your wrist aligned (neutral position, not bent up or down) and allows your palm and fingers to move freely. A bad rest that's too thick or too firm can increase strain even if it's cool.
Lumbar cushions:
- Memory foam: Often retains body heat. On flare days, a lumbar cushion meant to support can feel like it's trapping inflammation.
- Cooling gel pads: Explicitly marketed for heat management; more expensive but valuable for temperature-sensitive individuals.
- Adjustable tension options: Some lumbar supports let you dial firmness; gentler on variable pain levels.
Upgrade note: Start with a chair that has basic lumbar support built in. Add a removable, breathable cushion only if your chair feels flat. This keeps your setup flexible and lets you swap materials seasonally.
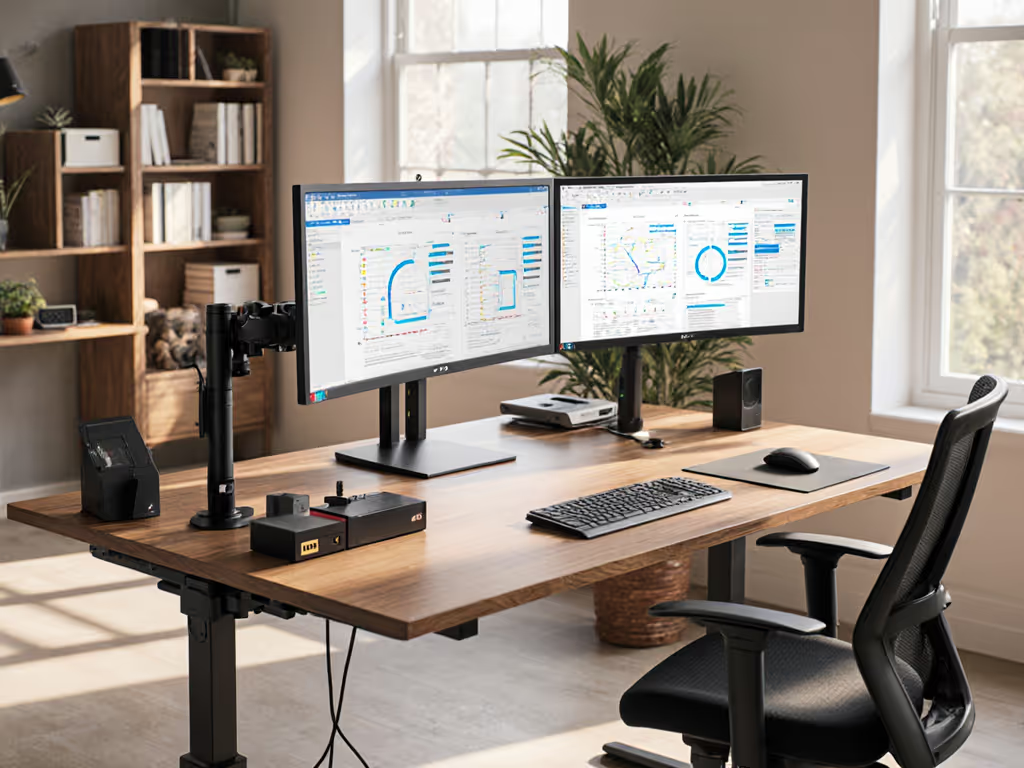
6. How do I avoid the "collision cascade" (where a new accessory breaks an existing setup)?
This is the real reason people return gear. A monitor arm works great until you add a second monitor. A desk organizer looks perfect until your new standing desk base hits it. Rheumatoid arthritis desk tools demand even more care because accessibility matters; a setup that worked before a flare might not work after.
Prevention framework:
- Map before you buy: Note the location of every existing item (monitor, chair, desk edge, wall, outlets, drawers). Add the new accessory to your mental or drawn map. Will it collide?
- Measure override reach: If adding a monitor arm, measure the reach (typically 20-28 inches from desk back). Will it clear your wall? Will it hit your monitor if you're sitting close?
- Vertical stacking: Assess what sits on top of, next to, or below your new item. A power strip under the desk might be in the path of a laptop stand.
- Flare-day accessibility: If your setup needs adjustment (arm repositioning, cable unplugging), can you do it with one hand or reduced grip? If not, it's not autoimmune-friendly.
- Clamp and grommet priority (renter-safe zones): Avoid adhesive pads on valuable surfaces. Clamps and grommets (holes drilled into the desk itself) are reversible and don't damage finishes. On a rental, grommet kits cost $20-50 and pay for themselves in peace of mind.
7. What's a realistic upgrade path for someone starting with a small budget?
Phase 1 (Months 1-3, ~$150-250):
- Centered or vertical mouse (assess which feels more natural in a 30-day trial).
- Compact, split, or standard keyboard at a comfortable height.
- Basic desk mat with wrist support (establishes your primary work zone; signals safe reach distances to your brain).
Upgrade notes: Avoid expensive monitor arms or standing desks yet. You don't know your exact workflow constraints.
Phase 2 (Months 4-9, ~$300-500):
- Monitor arm (single) if you have two monitors or an ultrawide. This lifts the screen to eye level and frees desk surface.
- Document stand or laptop holder (creates a tertiary work zone without reaching).
- Under-desk cable tray or clips (reduces tripping hazard; improves organization). Compare options in our desk cable organizer tests to choose hardware that fits your desk thickness and layout.
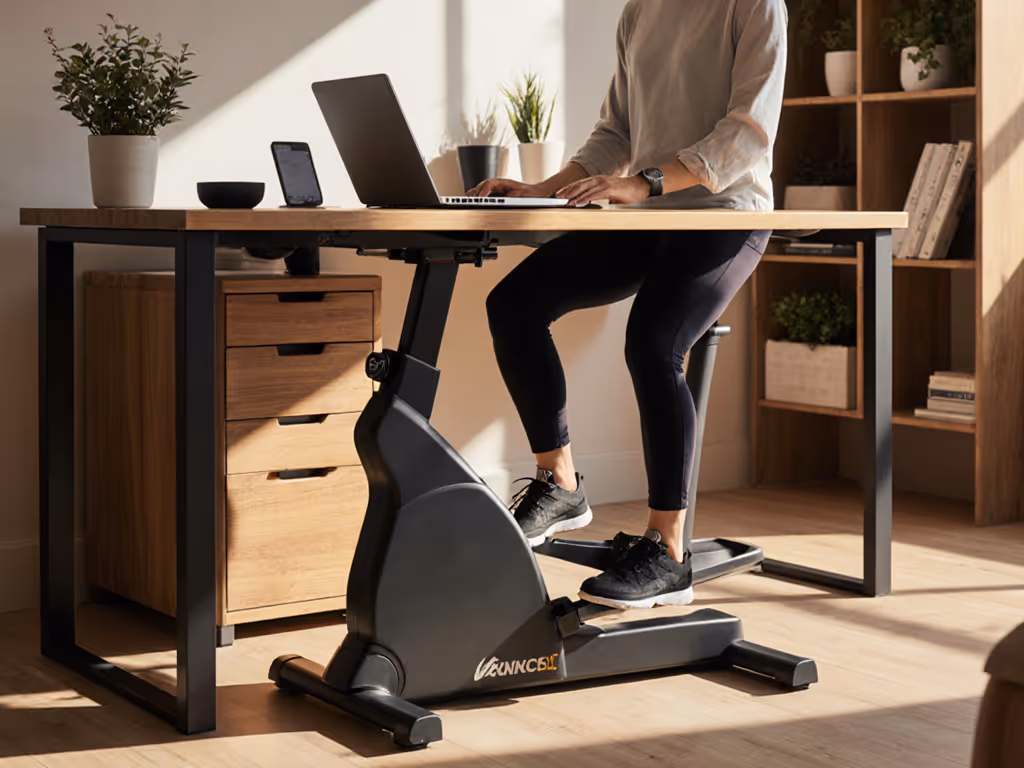
Phase 3 (Months 10+, ~$600+):
- Standing desk base or height-adjustable converter (only after you've validated your keyboard, mouse, and monitor are dialed in).
- Footrest (improves posture and reduces leg fatigue during standing transitions).
- Monitor light or indirect ambient lighting (reduces eye strain, secondary to monitor positioning).
This staggered approach gives you time to identify what truly causes flares and discomfort, rather than buying everything at once and guessing. You can adjust calmly as patterns emerge.
Practical Checklist: Before You Checkout
- Desk depth, thickness, and wall distance measured and compared to accessory specs.
- Chair height, armrest position, and legroom confirmed free of collision points.
- Wrist, elbow, and shoulder angles tested in your current setup (baseline for comparison).
- Outlet locations and cable length requirements documented.
- Heat sensitivity and grip-strength constraints noted (influences material choice).
- Installation method confirmed as renter-safe or owner-friendly (clamp/grommet/adhesive risk assessed).
- Return policy reviewed (especially for items over $100).
- Upgrade path sketched (what will you add in 6 months? Does this choice still fit?).
Closing: Map Your Desk Before Your Cart
Autoimmune-friendly desk accessories aren't magic. They're tools that respect the reality of your body's constraints and give you the flexibility to adapt as those constraints change day to day. The difference between a successful setup and a return disaster almost always comes down to one thing: measurement and planning before purchase.
When I moved into a rental years ago, I wanted a fancy clamp mic arm to streamline my desk. I didn't measure first. The arm needed a 2-inch overhang my desk couldn't provide. Instead of returning it, I spent an evening drafting a starter fit map (desk dimensions, chair position, wall clearance, drawer swing). That single page of plain-language measurements turned every subsequent purchase into a confident, first-try win. No surprises. No collisions. No waste.
Your workspace is the physical foundation of your daily capacity. Treat the setup phase as seriously as you'd treat adjusting a medication: measure, observe, adjust, then scale. Start with a fit map; buying gets calmer and cleaner. Your future self (on a flare day, rushed for a deadline, or simply tired of making decisions) will thank you.
Next steps: Measure your desk dimensions and chair position this week. Photograph your current workspace. Note any pain points or awkward reaches. Then return here with your fit map, and every accessory choice becomes a data-driven decision, not a gamble.