Ultrawide Monitor Desk Setup: Ergonomic Blueprint
By Sora Tanaka • 1st Dec
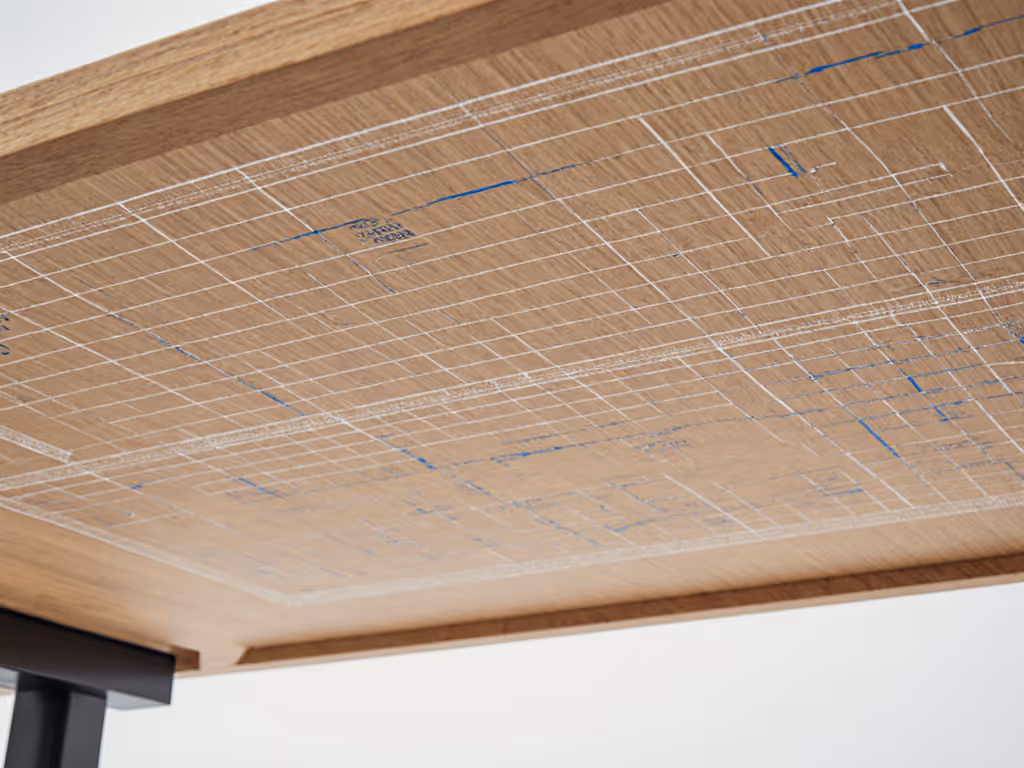
The Underside Map: Your Foundation for Success
Why Grid Coordinates Matter More Than Inches
When you invest in an ultrawide monitor desk setup, the promise of seamless multitasking quickly collides with reality if your ergonomics for wide screens planning is incomplete. As a workspace planner, I've seen countless professionals order expensive ultrawide displays only to discover their monitor stand for dual monitors doesn't clear the desk crossbars, or their cable management system conflicts with mounting hardware. The difference between frustration and flow? A systematic blueprint that maps your desk's underside geometry before you order a single component. This isn't just about arranging monitor geometry; it's about creating a foundation where every millimeter serves a purpose.
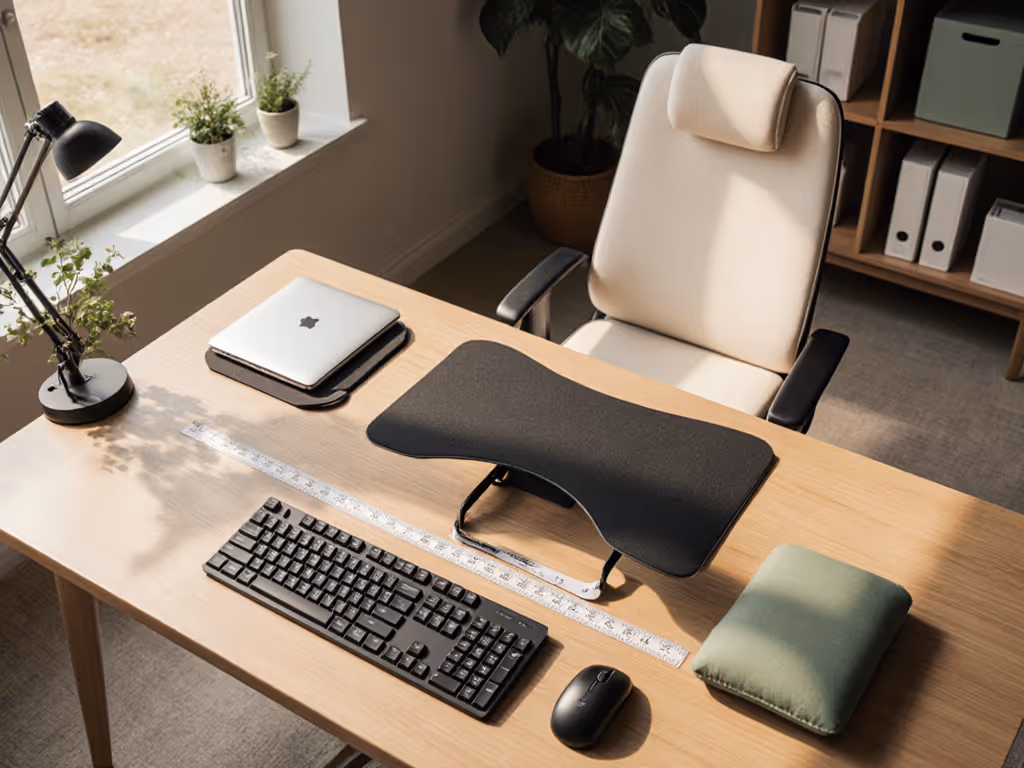
Before measuring your monitor's footprint, start with your desk's hidden landscape. Most ultrawide failures stem from ignoring what's beneath the surface: crossbars, cable passthroughs, and drawer mechanisms that turn smooth upgrades into collision nightmares. Create an underside map with grid coordinates, not just linear measurements. Mark every obstruction at 5cm intervals like an architect's blueprint. This transforms vague "fits most" claims into precision engineering. For tight apartments and studio desks, our compact workspace grid guide shows how to plan dimensions that actually fit.
Last month, a client's triple-monitor upgrade failed when their new arm base overlapped their raceway by 12mm. We'd assumed the desk was clear based on top-down measurements. When we plotted the underside on a grid (mapping clamps, grommets, and leg locations), the conflict became obvious. The rebuild proved that modular rails beat one-off fixes every time. Blueprints prevent collisions; they don't just fix them.
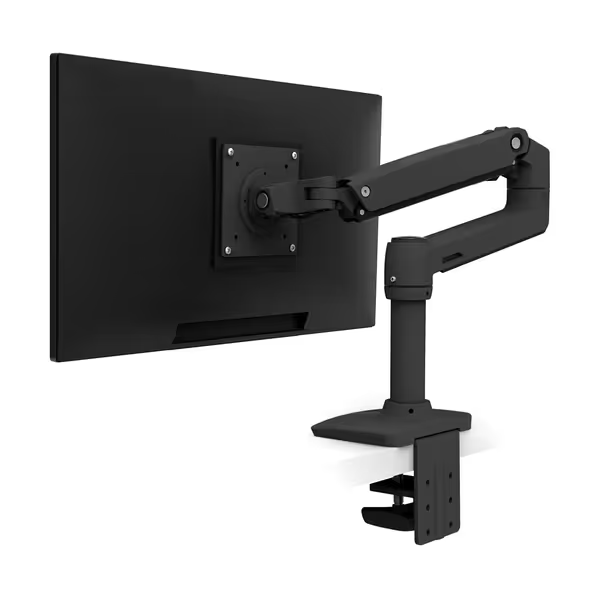
Ergotron LX Monitor Arm
Ergonomic monitor arm for flexible, space-saving screen positioning.
$204.96
Screen Size & Weight CapacityUp to 34 inches, 7-25 lbs
Screen Size & Weight CapacityUp to 34 inches, 7-25 lbs
Pros
Securely holds heavy ultrawide monitors.
Exceptional range of motion and adjustability.
Cons
Some users find it to be overpriced.
Customers find the monitor arm to be of high quality, sturdy enough to hold heavy drawing tablets, and appreciate its versatile motion range and ease of installation. The arm is praised for its seamless adjustability, secure hold, and functionality, particularly with 38" ultrawide displays. While some customers consider it worth its price, others feel it's overpriced.
Customers find the monitor arm to be of high quality, sturdy enough to hold heavy drawing tablets, and appreciate its versatile motion range and ease of installation. The arm is praised for its seamless adjustability, secure hold, and functionality, particularly with 38" ultrawide displays. While some customers consider it worth its price, others feel it's overpriced.
Conducting a Full Collision Audit
Your collision audit must include five critical zones:
- Desk thickness (0.4"-2.4" is standard clamp range)
- Crossbar clearance (measure depth from front edge)
- Cable passthrough locations (often 2"-4" from rear edge)
- Drawer travel paths (extend fully to check interference)
- Chair arm clearance (critical for sit-stand transitions)
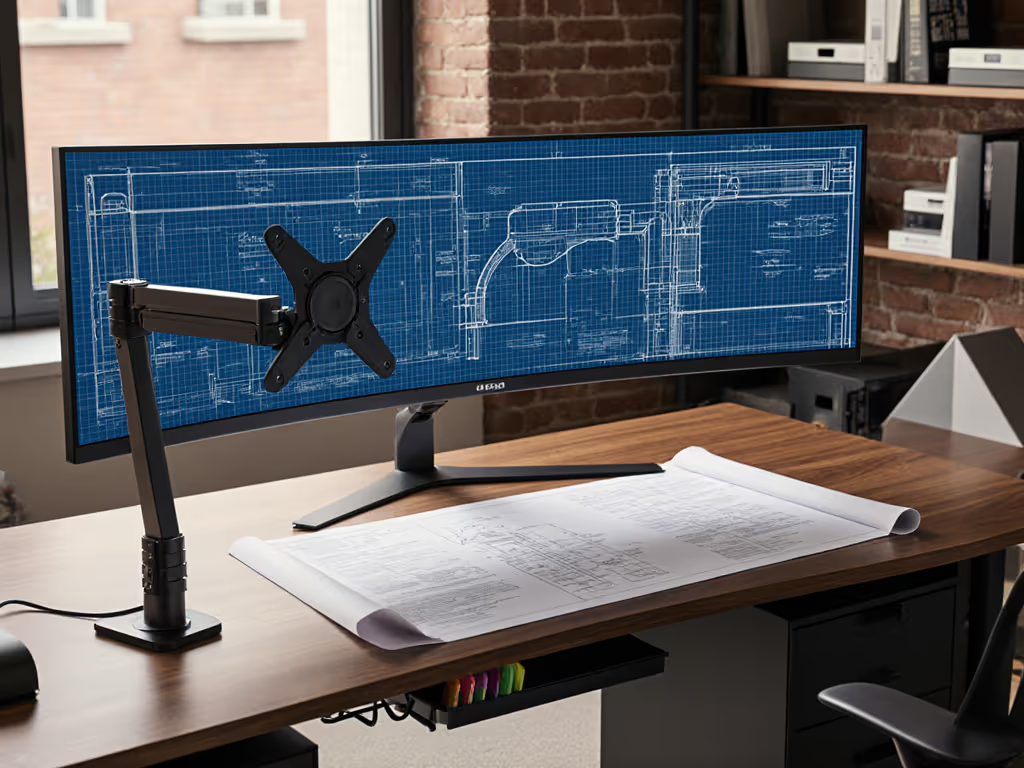
For ultrawide accessory placement, factor in your monitor's mounting depth (the distance from screen to VESA plate). That 34" curved display might need 3.6" of clearance where a flat panel needs 2.5". Misjudging this by even 10mm can force your monitor forward, compromising viewing distance.
Building Your Step-by-Step Ultrawide Blueprint
Step 1: Define Your Ergonomic Baseline
Wide screen ergonomics follows the same fundamentals as standard setups, but with amplified consequences for errors. Position your eyes level with the top third of the screen, approximately 30-36" from center. For ultrawides, this creates a critical tension: achieving proper distance on shallow desks while maintaining clearance for mounting hardware.
Key metric: Your monitor's horizontal sweep requires 1.5x more arm extension than standard displays. A 34" ultrawide needs 22-25" of reach to position correctly at 32" viewing distance.
Step 2: Blueprint Mounting Infrastructure
- Mark your desk's centerline on the underside map
- Plot grommet holes at 5cm grid intervals (standard 80mm spacing)
- Calculate arm reach needed: viewing distance minus desk depth
- Check expansion slots: leave 3" clearance behind VESA plate for future arm upgrades
Most failed dual-monitor stand setups ignore step 4. When I helped a developer add a secondary ultrawide, their existing clamp blocked the new arm's pivot point. We'd planned expansion slots from day one, so we simply extended the rail system (no part replacements needed).
Step 3: Optimize Cable Management for Panoramic Workflows
Ultrawide cables create unique challenges: longer cable runs, higher power demands, and limited routing options along wide mounts. Implement a tiered system: Not sure which raceway or under-desk kit to choose? Start with our cable management systems comparison.
- Primary channel: 2" raceway along desk rear edge (feeds USB-C docks)
- Secondary channels: 1" channels at left/right thirds (for peripheral hubs)
- Expansion conduit: Hollow rails with 40% spare capacity (for future devices)
Route video cables through the center channel (HDMI/DisplayPort lines benefit from a minimal bending radius). Power cables run left/right to avoid EMI interference. If you want fewer separate bricks and wires, consider integrated smart desk hubs to centralize power and I/O. Always leave room for your next device where cables converge.
Step 4: Validate Your Geometry Before Ordering
| Component | Critical Check | Fail Condition |
|---|---|---|
| Monitor arm | At full extension, does clamp clear crossbars? | Less than 0.5" clearance |
| Cable cover | Does channel depth exceed cable bundle height? | Bundle > 80% channel capacity |
| Secondary mounts | Does secondary arm clear primary monitor base? | Less than 2" lateral clearance |
This grid-based validation prevented a corporate client from purchasing 47 mismatched arms. Their spec sheet said "fits all desks," but our blueprint revealed 12mm conflicts with their specific crossbar placement.
Future-Proofing Through Modular Design
Designing for Tomorrow's Upgrades
Your ultrawide monitor desk setup should anticipate three common evolution paths:
- Monitor size increase (34" → 49")
- Secondary display addition
- Sit-stand transition
Modular rails with standardized hole patterns (80mm spacing) accommodate all three. Planning a height-adjustable swap? Our premium vs budget standing desks breakdown covers stability and long-term value. When adding a second ultrawide, simply attach another mounting plate to the existing rail (no remeasuring, no new clamps). This approach saved a financial analyst $427 in replacement parts during their dual-monitor expansion.
The 3-Point Rule for Sustainable Setups
- Always verify mounting depth against arm specifications
- Never position accessories tighter than 90% of stated clearance
- Document your grid coordinates for future upgrades
Following these rules transformed a content creator's workflow. When they switched from dual 27" displays to a single 49" ultrawide, their documented grid coordinates let them recalibrate in 18 minutes (no trial-and-error, no returns).
Blueprint the underside; future upgrades stop colliding and start flowing.
Your Actionable Next Step
Grab a tape measure and grid paper (or use free CAD software like SketchUp Free). Spend 20 minutes creating your underside map, marking:
- Every obstruction at 5cm intervals
- Your primary monitor's centerline position
- Existing cable pathways
- 3" expansion zones at each mounting point
This collision audit prevents the most common ultrawide mistakes before you spend a dime. I've watched clients skip this step and return $1,200 in misfit hardware. Don't let that be you. Leave room for your next device in every measurement, and your ultrawide monitor desk setup will evolve as smoothly as your workflow.
When you approach ergonomics for wide screens as a system, not a collection of parts, you transform desk chaos into precision engineering. Your most valuable upgrade isn't another monitor or arm; it's the blueprint that makes everything work together. To anticipate what's coming next, browse our future-proof desk accessory trends.