Sound Absorption Desk Accessories for Quieter Workspaces
By Priya Menon • 2nd Jun

If your workspace is already packed with monitors, arms, and cables, sound absorption desk accessories can feel like "one more thing" to juggle. But the right noise-reducing workspace tools, mapped to your actual dimensions, can calm echo, soften keyboard clatter, and make calls clearer (without drilling a single hole). For a room-wide perspective on treating noise and choosing headphone types, see our workspace acoustics guide.
Start with a fit map; buying gets calmer and cleaner.
This FAQ-style deep dive walks through desk-level acoustic optimization in plain-language measurements, with renter-safe, small-footprint options you can layer in over time.
FAQ 1: What do sound absorption desk accessories actually do?
Short answer: They reduce reflected sound around your desk, so what you hear (and what your mic picks up) is less sharp, less echoey, and easier to understand.
At a desk, noise problems are usually not "thin walls" first. They are:
- Reflections: Sound from your voice, keyboard, or speakers bouncing off hard surfaces (desktop, nearby walls, windows, monitors).
- Near-field noise: Close-up sounds (typing, mouse clicks, fans) hitting your ears and microphone before they decay.
Sound absorption desk accessories attack those two issues by:
- Adding soft, porous materials near the sound path (felt, fabric, foam, wool, dense recycled fiber).
- Breaking up large flat, reflective areas (bare desktop, bare wall right in front of you).
- Creating micro-barriers between you and noise sources (laptops, small fans, housemates in the same room).
You are not trying to make your room silent. You're trying to make the area within about 3-4 feet (90-120 cm) of your ears less reflective and less harsh.
FAQ 2: How is this different from "soundproofing"?
Soundproofing = blocking sound from leaving or entering a room (thick walls, heavy doors, sealed gaps).
Desk-level acoustic optimization = treating the sound inside the room, right around your working zone.
Typical differences:
-
Materials
-
Soundproofing: heavy, dense (mass-loaded vinyl, double drywall).
-
Desk absorption: light, porous (felt, acoustic PET, fabric-covered panels).
-
Goal
-
Soundproofing: reduce transmission between rooms.
-
Desk absorption: reduce echo, harshness, and mic noise around you.
If you're in a rental or small apartment, soundproofing is usually unrealistic. But strategic placement of sound-absorbing materials at desk height can dramatically improve call quality and reduce fatigue.
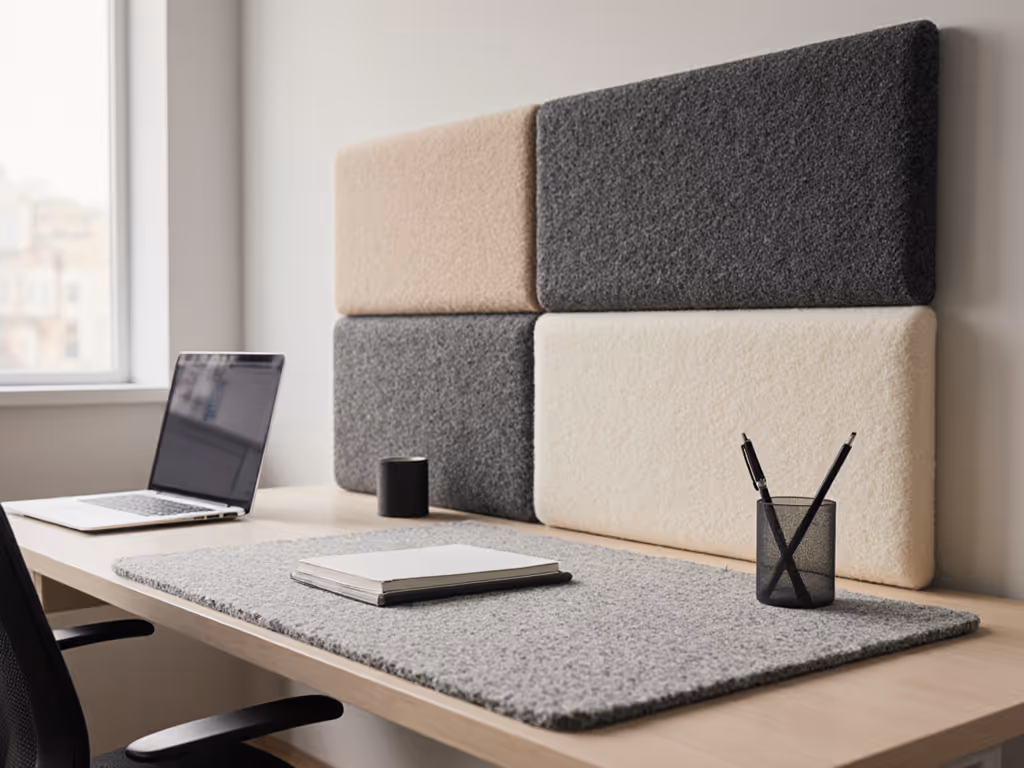
FAQ 3: Which sound absorption desk accessories make the biggest difference?
Think in layers around your body: desktop -> side edges -> in front of you -> under desk.
1. Large desk pad or mat (primary layer)
A full-width desk pad made of felt, cork+rubber, or thick neoprene does three jobs: If you're deciding on materials, our leather vs cork desk pad comparison tests writing feel, mouse glide, and long-term durability.
- Breaks up the largest reflective surface directly under your mic and keyboard.
- Softens impact sounds from typing and mouse movement.
- Adds a visual "safe zone" for other accessories.
Plain-language measurement tip: Aim for a pad that covers at least 70-80% of your desk width and the full depth of your keyboard + mouse area (often 12-15 in / 30-38 cm).
2. Desk-mounted acoustic screens / privacy panels
These are short fabric or felt panels that clamp or sit on the back or sides of the desk. They:
- Catch reflections from your voice that would bounce off the wall behind the monitor.
- Act as mini barriers against noise from a shared room.
- Create visual and acoustic separation in small space acoustic design.
For most setups:
- Height: 12-18 in (30-45 cm) above the desk is a good starting point.
- Width: Ideally spans at least the width of your main monitor.
3. Under-desk absorption panels
The underside of the desk is often a hard, parallel surface that contributes to boxy, 'honky' sound when you talk.
Thin, light panels (felt, PET, or fabric-wrapped boards) mounted with no-drill options (removable adhesive strips, under-desk rails) can:
- Soften reflections from your voice and keyboard bouncing off your lap and desk underside.
- Slightly reduce noise escaping downward to a downstairs neighbor's ceiling.
Plain-language measurement tip: Before mounting anything, measure leg clearances:
- Allow at least 5-6 in (13-15 cm) of free space above your knees in your normal chair height.
- Keep panels at least 2 in (5 cm) away from moving parts like keyboard trays or sit-stand frames.
4. Soft side barriers at ear level
On narrow desks or corner setups, side reflections can be strong.
Options that help:
- A felt desk caddy or organizer towered to about 8-10 in (20-25 cm) tall at one side.
- A small, freestanding acoustic panel on the side closest to a noisy hallway or roommate.
These do not need to form a wall. Even partial coverage of the first 12-18 in (30-45 cm) beside you noticeably changes what your mic hears.
5. Soft backer behind your monitor
The wall right behind your monitor is a high-impact reflection point. If call quality is a priority, pair this with our video call desk essentials for lighting and framing that complement acoustic fixes.
Renter-safe ideas:
- Lean a fabric-covered board or thick cork board behind the monitor.
- Use removable strips to mount a felt pinboard roughly centered at your mouth height when seated.
Even a panel 24×24 in (60×60 cm) placed at the approximate height of your mouth captures a lot of "early reflections" that cause intelligibility problems on calls.
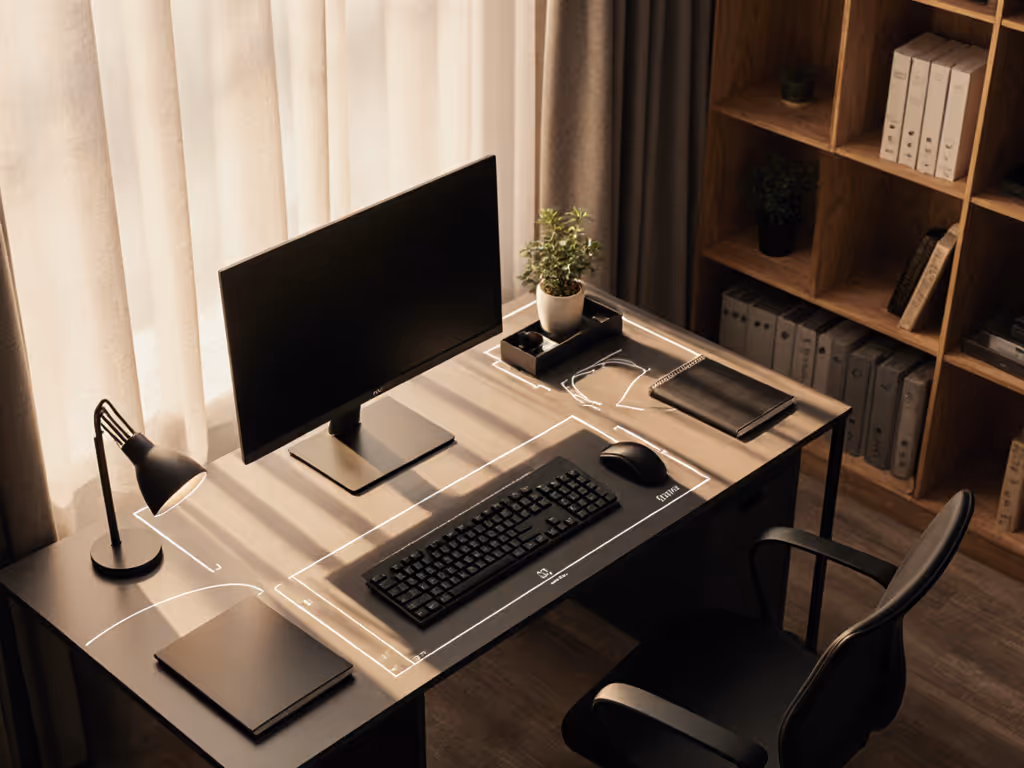
FAQ 4: How do I "map" my desk for acoustics before buying anything?
Map your desk before your cart.
Treat this like a starter map exercise (just like you'd do for monitor arms or trays).
Step 1: Draw a top-down sketch
On a sheet of paper (or a quick digital sketch), note:
- Desk width and depth (e.g., 47×24 in / 120×60 cm).
- Wall distances: how far the desk sits from the wall behind and on each side.
- Big fixed items: monitor stands, lamp bases, speaker stands, mic arm base.
Step 2: Mark acoustic "safe zones"
Safe zones are places where you can add soft accessories without colliding with existing hardware.
Common safe zones:
- The rear 4-6 in (10-15 cm) strip of the desk behind your monitor(s).
- The side edges beyond your keyboard/mouse area.
- Under-desk zones that are not used by your knees, crossbars, or drawers.
Shade these on your sketch. These are your sound absorption placement candidates.
Step 3: Mark "no-go" collision areas
Look for:
- Crossbars or sit-stand mechanisms within 4 in (10 cm) of the desk underside.
- Keyboard trays, CPU holders, or drawer fronts.
- Mic arms and monitor arms that swing.
If a clamp or moving arm needs a 2 in (5 cm) overhang or a clear arc, don't block that with a thick panel. I once had a mic arm that looked perfect on paper but needed more overhang than my desk had; a quick fit map would've avoided that surprise.
Step 4: Prioritize first-impact areas
If you can only treat a few spots, target where sound first bounces between your mouth and nearby surfaces:
- The desktop area directly in front of you -> large desk pad.
- The wall or panel behind your monitor -> small fabric or felt board.
- The space immediately under the desk where your voice might bounce off your lap -> one or two small under-desk panels.
This map-based approach keeps you from buying panels that block arms, drawers, or legroom.
FAQ 5: What are good work-from-home noise solutions if I'm renting and short on space?
For work-from-home noise solutions in rentals, the constraint list usually looks like: no drilling, small footprint, and quick removal.
Renter-safe, no-drill options
Use:
- Clamp-on screens that grab the desk edge (verify desk thickness, usually 0.6-1.5 in / 1.5-3.8 cm).
- Freestanding panels that sit on the desk or floor and can be moved.
- Removable adhesive strips rated for the weight of felt or fabric boards.
Avoid:
- Permanent spray adhesives on the desk or walls.
- Panels that require screws into the desktop unless you own it.
Small space acoustic design moves
In tight rooms or studio apartments, try:
- Dual-purpose items: felt pinboards that act as both sound absorption and visual organization.
- Vertical stacking: one tall, narrow panel instead of several small ones, especially beside a window or door.
- Soft backdrops behind your chair: a clothes rack with a thick curtain or blanket can significantly soften your voice reflections on calls.
The goal is to have a few well-placed, high-impact absorbers, not to cover every surface. If you also add movement gear, compare dB levels in our under-desk exercise equipment tests to keep shared spaces quiet.
FAQ 6: How do I know if an accessory will actually make a difference?
Even without lab equipment, you can be systematic. For voice-first workflows, follow our voice workstation setup blueprint to optimize mic placement and reflection control.
Simple listening tests
- Record a 15-30 second voice memo at your desk.
- Add one accessory (e.g., full desk pad or a fabric board behind the monitor).
- Record again, same position, similar speaking level.
Listen for:
- Less "ring" or "hollowness" between words.
- Softer keyboard and mouse sounds.
- Clearer consonants (t, k, s) without harshness.
Basic material checks
When browsing noise-reducing workspace tools, look for:
- Thickness: felt or panels in the 0.3-1 in (8-25 mm) range are more meaningful than ultra-thin decorative sheets.
- Porosity: fabric, felt, and fibrous materials are generally better absorbers than hard plastics.
- Surface area: one large pad or panel often outperforms several tiny patches.
If a product is very thin, very hard, and very small, it is mostly aesthetic, not serious absorption.
FAQ 7: What are common mistakes to avoid, and how can I upgrade over time?
Frequent mistakes
- Buying wall panels first, desk second: then discovering you have nowhere to place monitor arms or shelves.
- Blocking clamps: placing thick rear-edge panels where monitor or mic clamps need flat contact.
- Ignoring under-desk hardware: sticking panels where they collide with sit-stand frames or trays.
- Over-treating: covering every surface with soft material, making the room feel dead and uncomfortable.
Upgrade notes: a staged path
You can build a quieter workspace in three measured passes:
- Pass 1 - Core desk layer
- Full-width desk pad.
- Optional soft organizer or caddy on the noisiest side.
- Pass 2 - Reflection control at eye level
- One panel behind the monitor.
- One side panel or freestanding screen on the noisier side of the room.
- Pass 3 - Under-desk and refinements
- A couple of under-desk panels in safe zones that don't hit knees or crossbars.
- Swap or reposition items based on quick before/after recordings.
Keep your starter map updated as you add monitor arms, mic booms, or extra screens. Acoustic accessories should flex with those changes, not force a teardown.
FAQ 8: Where should I go from here?
Use one focused session to:
- Sketch your desk and nearby walls.
- Mark safe zones and no-go zones for clamps and panels.
- Choose one high-impact accessory to test first (usually a large desk pad or a panel behind the monitor).
Rerun your audio test after every change and keep brief notes. Over a few weeks, you'll build your own desk-level acoustic playbook: which placements calm echo, which soften typing, and which aren't worth the footprint.
You don't need a studio to sound clear and feel calmer at your desk (just a mapped space, a few well-chosen soft surfaces, and the habit of fitting them on paper before you commit). Start with a fit map and iterate; the quieter, more focused workspace will follow.
Related Articles